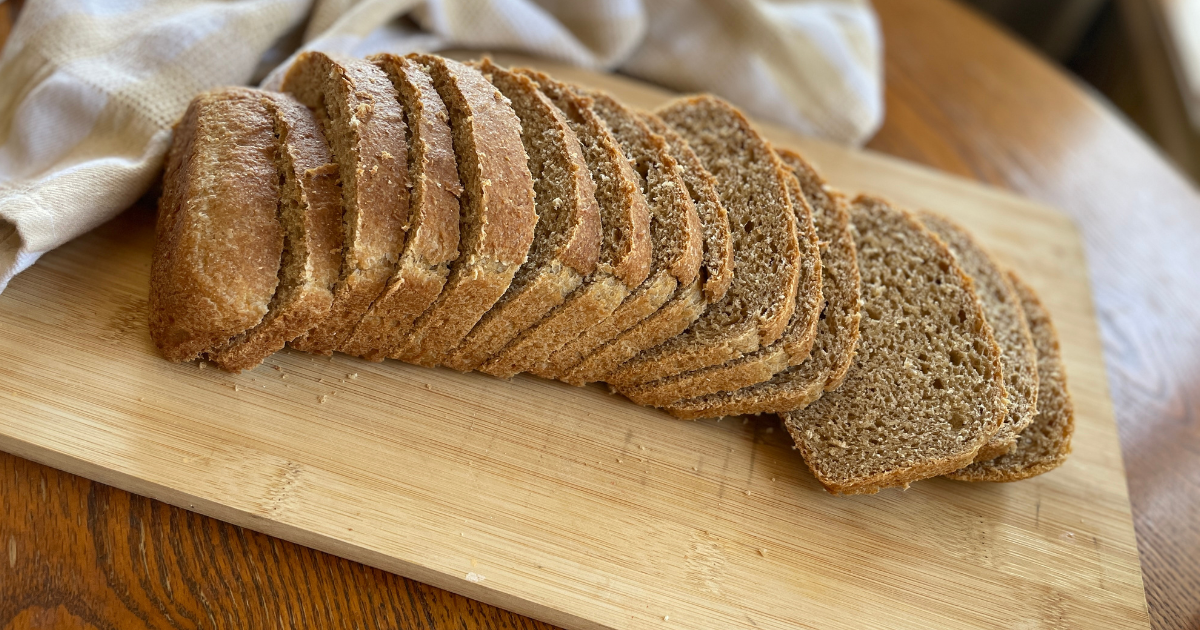
Fresh Milled Flour Sourdough Sandwich Loaf
This fresh milled sourdough sandwich loaf might just be your new favorite bread. With the characteristic flavor of whole grains and a soft texture, this bread is truly the best of the fresh milled bread world.
If you’ve ever tried baking sourdough with fresh milled flour and ended up with a dense or crumbly loaf, you’re not alone. I started diving into fresh milled flour, a couple of years ago for the nutritional benefits, but I consistently turned out dry, crumbly loaves of bread. I resigned myself to believing that we would have to settle for dry bread if we wanted the benefits of whole grains.
Enter the day last summer when I made a happy accident in the kitchen and turned out the most amazing sandwich loaf of whole grain bread. The next week I tried again, same results. This whole grain sourdough sandwich loaf has consistently gotten rave reviews from those who’ve tried it or bought it at the market and I can’t wait to share the recipe with you.
Fresh milled flour behaves differently than all purpose flour, but I’ve learned a few tips and tricks for making a delicious loaf of fresh milled flour sourdough loaf and I want to share them with you. It truly is possible to have nutritious, whole grain bread that is also delicious.

What Is Fresh Milled Flour?
Fresh milled flour is whole grain flour that has been ground from wheat berries just before baking. Unlike store-bought flour, it contains the bran, germ, and endosperm. Because it is freshly milled and contains all parts of the wheat berry, it is an excellent source of vitamins and minerals and it retains more fiber and enzymes, making it a truly nutrient dense food.
Benefits of Using Fresh Milled Flour for Sourdough
More Nutrients and Flavor
Because it is freshly milled, whole grain flour has a richer, nuttier flavor than traditional flours. It is naturally rich in fiber, b vitamins, and minerals like iron and magnesium. Fresh milled flour contains 40/44 essential nutrients, whereas commercial flour can lose up to 80% of its nutrition through processing.
Easier Digestion
Fresh milled flour contains active enzymes which makes it easier to digest. Sourdough fermentation helps break down phytic acid in whole grains, making nutrients more bioavailable. When these two are combined, you get a loaf of bread that is nutrient dense and much easier to digest. In fact, many people who are gluten intolerant find that they can eat fresh milled flour without issue.
A Softer Whole Grain Sandwich Loaf
With the right hydration and fermentation, fresh milled flour sourdough can be surprisingly soft—perfect for sandwich bread. The other secret here is the coconut oil and honey. Both of these ingredients add moisture and help to create a soft loaf of bread.
Why Make a Sourdough Sandwich Loaf Instead of a Boule?
While rustic sourdough loaves are beautiful, a sourdough sandwich loaf is far more practical for daily life. Using a loaf pan also helps fresh milled flour hold its structure and rise more evenly. The steady rise and lower baking temperature work together to create a softer texture bread.
Why You’ll love this Fresh milled flour recipe
This fresh milled flour sourdough sandwich loaf has become a staple in our home, here’s why:
- Uses simple, real ingredients
- More nutrients from the fresh milled flour
- Benefits of sourdough fermentation
- Soft, delicious and versatile loaf
How to Make Fresh Milled Flour Sourdough Bread
Start by grinding your wheat berries. This is the grain mill I’ve been using for the last two years and it has been wonderful.
In a large mixing bowl, tare your scale to zero with the bowl on it and then weigh out your ingredients, starting with the wet ingredients: water, sourdough starter, coconut oil, and honey and mix that all together. Add the salt and flour and stir until it is all incorporated into a rough, shaggy dough.
At this point, allow the dough to rest for a 30 minutes – 1 hour. This allows the flour time to hydrate and absorb the moisture. If the dough is sticky and difficult to work with at this point, add a little more flour, just until it is workable and does not stick to your hands.
Rather than kneading, you will perform a series of stretch and folds on the dough. To do this, pull up on the edges of your dough and stretch, then tuck down across the top of the dough ball. Turn the bowl 1/4 of a turn and stretch the dough again. Turn the bowl another 1/4 turn and repeat the stretch and fold. Let rest for 15 minutes.
After 15 minutes, return to your bread dough and perform another series of three stretch and folds, then allow to rest for 15 minutes. Repeat this stretch, fold, and rest process a total of four times. You should begin to notice that the dough is smoother, more pliable, and begins to expand in between stretch and folds.
After four series of stretch and folds, cover the bowl tightly with plastic wrap and allow to bulk rise at room temperature for 4-6 hours. You’re looking for it to double in size. While you can allow it to bulk ferment even longer, keep in mind that whole grains do ferment faster and develop more of the “sour” taste faster than all purpose flour loaves.
Once the dough has doubled in size, dump it out onto the counter and shape into a rectangle. Fold the dough in thirds, like you would a letter, and seal the ends by tucking and pulling it against the counter.
Place the loaf into a grease loaf pan and allow to rise 1-2 hours or until double in size. Bake at 375 for 30 minutes or until internal temperature reaches 190 degrees.
Allow to fully cool before slicing.

How to store fresh milled flour bread
Because this bread does not have any preservatives in it, it will dry out and mold very quickly at room temperature, especially in the heat of summer. As a general rule, it should stay fresh on the counter for 3-4 days.
Fresh milled flour bread does freeze very well. Slice the bread and store in a zip loc bag in the freezer for up to three months.
Tips for Success with Fresh Milled Flour Sourdough
Use Proper Hydration
Fresh milled flour absorbs more water than white flour. Dough should feel slightly tacky but not dry. Resist the urge to add more flour. If after you have allowed the dough to rest for at least 30 minutes it sticking to your hands and it difficult to work with, sprinkle in more flour just until it is workable.
Allow Extra Rest Time
A big secret here it to mix up the ingredients and then let it rest for 30 minutes or more. This allows the flour time to absorb the liquid and properly hydrate. This step is key with fresh milled flour. If you do not let it properly hydrate you will end up adding too much flour and the bread will be dry.
Include a fat in the dough
A good fat, like coconut oil or olive oil, will help the dough to retain moisture and remain soft after baking.
Don’t Rush the Rise
Whole grain sourdough rises more slowly. A well-fermented dough will give you better oven spring and a softer crumb.
Weigh the ingredients
Weighing ingredients helps to ensure a precise measurement and turn out a consistent product. This is really helpful when it comes to working with whole grains since the bread can easily dry out and become dense. A good kitchen scale like this one will become a staple in your kitchen.
How to store fresh milled flour
For optimal nutrients and freshness, it is best to use fresh milled flour shortly after milling. Extra milled flour can be stored in the freezer to retain some freshness. Always store wheat berries in a cool, dry place, and allow sourdough bread to cool fully before slicing for best texture.
Wrapping up
Bread made with fresh milled flour is incredibly nutrient dense and has a rich, nutty flavor. With a little practice, you can turn out a beautiful loaf of fresh milled flour bread that your family loves.
Ingredients
Method
- In a large mixing bowl, weigh out the wet ingredients: water, sourdough starter, coconut oil, and honey and mix that all together.
- Add the salt and flour and stir until it is all incorporated into a rough, shaggy dough.
- At this point, allow the dough to rest for a 30 minutes – 1 hour. This allows the flour time to hydrate and absorb the moisture. If the dough is sticky and difficult to work with at this point, add a little more flour, just until it is workable and does not stick to your hands.
- Perform a series of stretch and folds on the dough. To do this, pull up on the edges of your dough and stretch, then tuck down across the top of the dough ball. Turn the bowl 1/4 of a turn and stretch the dough again. Turn the bowl another 1/4 turn and repeat the stretch and fold. Let rest for 15 minutes.
- After 15 minutes, return to your bread dough and perform another series of three stretch and folds, then allow to rest for 15 minutes.
- Repeat this stretch, fold, and rest process a total of four times. You should begin to notice that the dough is smoother, more pliable, and begins to expand in between stretch and folds.
- After four series of stretch and folds, cover the bowl tightly with plastic wrap and allow to bulk rise at room temperature for 4-6 hours. You're looking for it to double in size.
- Once the dough has doubled in size, dump it out onto the counter and shape into a rectangle. Fold the dough in thirds, like you would a letter, and seal the ends by tucking and pulling it against the counter.
- Place the loaf into a grease loaf pan and allow to rise 1-2 hours or until double in size.
- Bake at 375 for 30 minutes or until internal temperature reaches 190 degrees.
- Allow to fully cool before slicing.